Pages

Wednesday, September 18, 2013

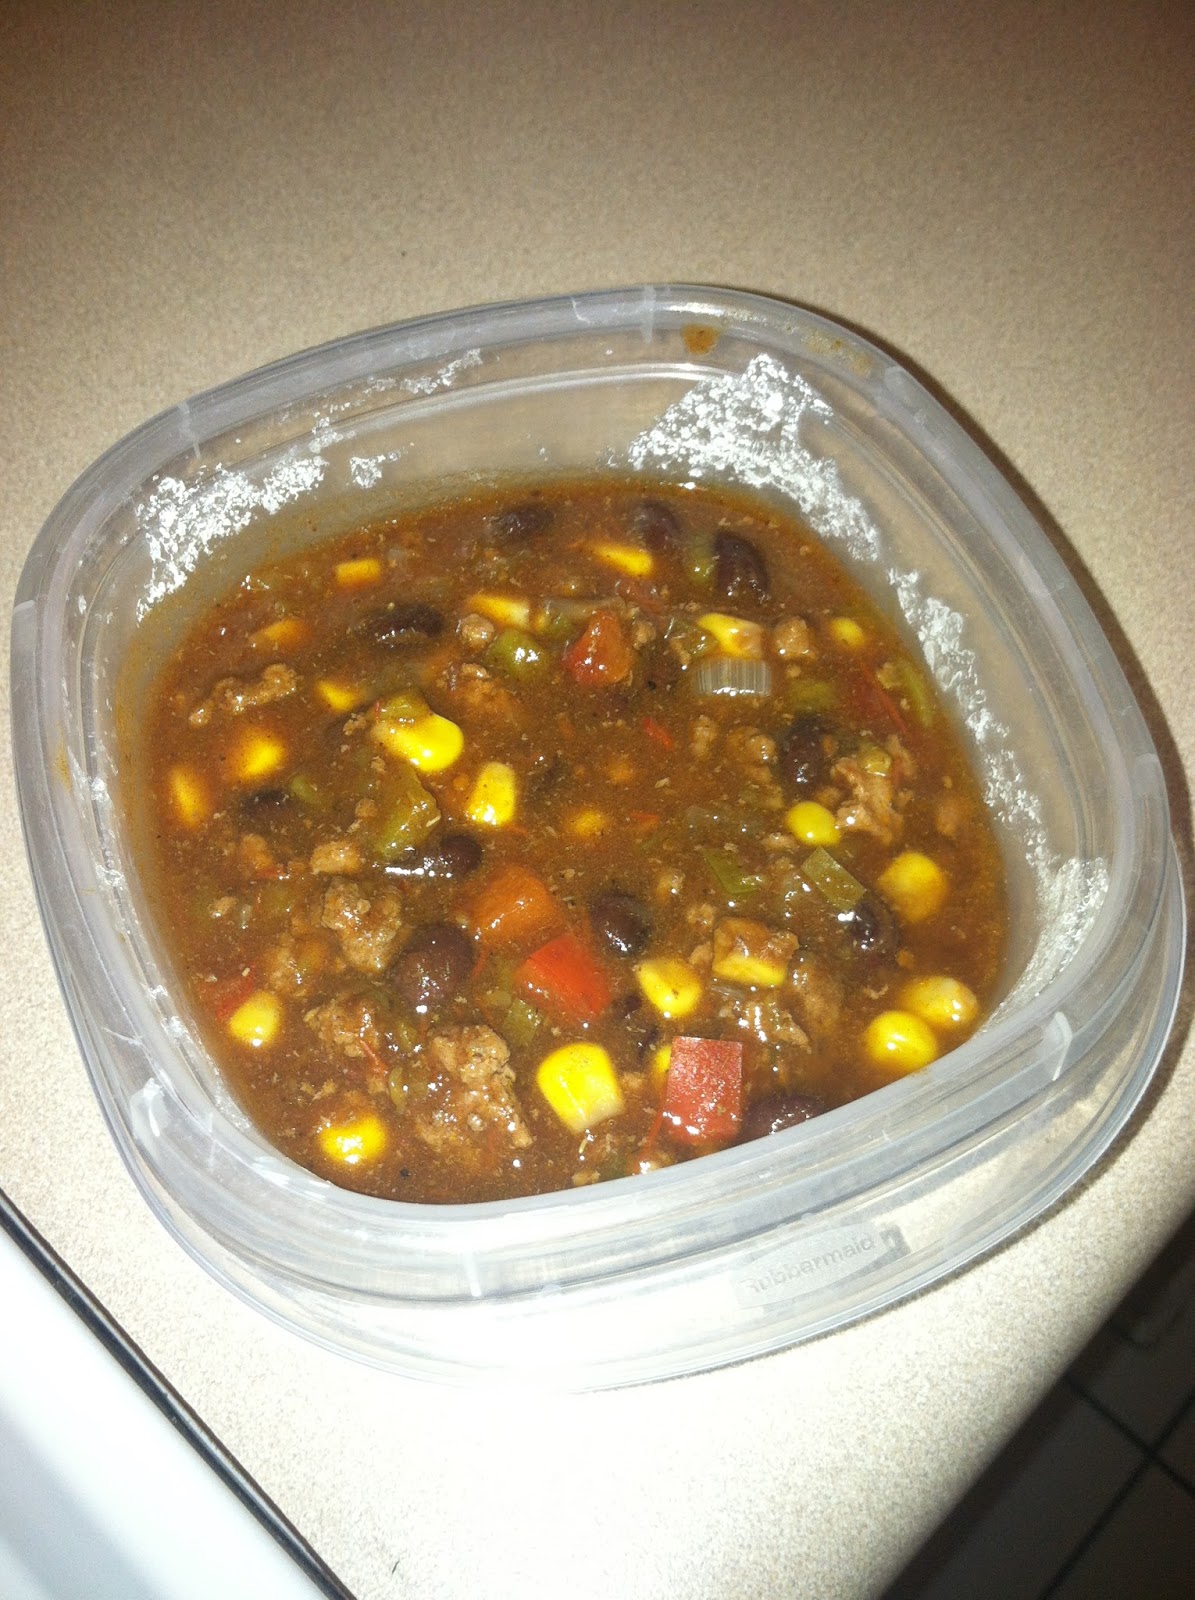
Kid-friendly turkey chili... Kind of.


I took a pound of ground beef out to thaw on Saturday. Given our refrigerator's imitation of an arctic winter I knew it would be mostly thawed by the time I needed to cook it Monday evening. Sunday night while prepping for the next day I went through my pins to see if there were any crock pot ideas involving ground beef. I came across this pin and after going through my mental cabinet inventory list thought, "I've got all of these ingredients. This looks like it will work." I didn't have the ground turkey (I used it last week) but ground beef would work.


The original masterpiece


My crayon attempt. Mine never turn out as nice as the originals...


Monday was a rough day. While prepping everything for the meal I pumped (as is usual when I first wake up) which ended in a fiasco that made me quit pumping at 45 minutes versus my usual 1.25hr. As I was prepping I realized I didn't have everything I thought I had (curse you Beef Taco Pasta using all of my Rotel tomatoes!) Then as we were getting ready, Atticus decided to try his hand at gymnastics without warning us and flipped out of Justin's arms onto the floor. He cried. Justin cried. I consoled both for 30 minutes. I decided to stay home from work. Mondays suck. But hey, the food was in the crock pot so when Justin went to classes Atticus and I stayed home to take a three hour nap. It helped.


Handling it like a champ!
 
In the end my recipe was pretty different. I think I will have to attempt this one again. The problem was partly that I didn't have the right stuff, but it was also that the seasoning was pretty bland. Justin has been giving me input on recipes I try and he liked this (he even commented on how he liked getting "the bursts of corn"), but I think I'd need to up the seasoning. Here's how I did it.

  • 1.3 lbs 99% lean ground turkey 1lb 93% lean ground beef
  • 1 teaspoon oil
  • 1 medium onion, minced
  • 1 red bell pepper, diced fine
  • 1 garlic clove, minced
  • 1 1/2 cups frozen corn kernels
  • 10 oz can Rotel Mild Tomatoes   14oz crushed tomatoes and 4oz diced green chilies
  • 8 oz small can plain tomato sauce
  • 1/4 cup low sodium chicken broth I used beef broth; using chicken broth with beef tastes odd
  • 1 teaspoon cumin  2t of my homemade taco seasoning
  • 1/2 teaspoon chili powder
  • 1/2 teaspoon paprika
  • 1/2 teaspoon kosher salt

  • Heat a large skillet over medium-high heat, add the turkey beef, season with salt and cook, breaking up with a spoon until turkey beef browns and is no longer pink; place into the slow cooker. Add the oil to the skillet and sauté the onion, garlic and bell pepper over medium heat for about 4 to 5 minutes. Spoon over turkey beef into the slow cooker and stir in corn and tomatoes, tomato sauce, cumin, chili powder, paprika chilies, taco seasoning, and salt, mix until well blended. Pour chicken beef broth into the crock pot and add the bay leaf. Cover and cook on HIGH 4 hours or LOW 6 hours. Serve with desired toppings.- After realizing it wasn't as flavorful as I'd hoped I added some diced olives and a spoonful of plain greek yogurt (I use it instead of sour cream these days). It helped, but still lacked. Will I make it again? Probably, but I'll definitely amp up the seasoning a bit. I was disappointed.

    Tuesday, September 10, 2013

    Italian Wonderpot

    I'm continuing my Budget Bytes kick with another pin. Specifically, this one here.
    Italian Wonderpot - Budget Bytes
    The Italian Wonderpot

    It's a spin on a Martha Stewart creation, according to the genius behind Budget Bytes. I followed the recipe pretty closely but switched things up a bit, as I am wont to do. It turned out pretty good, but I think I will make a few adjustments in the future. Specifically, I'm not sure that I will use whole grain pasta. It was a bit filling and now my tummy is rumbling a bit. In addition, I think I might add some mushrooms to the mix. I love mushrooms. Either way, without even asking Justin has deemed this a repeat (I usually have to pry it out of him) and since it only took 35 minutes from start to finish, I agree. This is the recipe and how I did it:

    Ingredients
    • 4 cups vegetable broth
    • 2 Tbsp olive oil
    • 12 oz. whole wheat fettuccine
    • 8 oz. frozen chopped spinach
    • 1 (28 oz.) can diced tomatoes
    • 1 medium onion
    • 4 cloves garlic
    • ½ Tbsp dried basil           I used 1.5T of homemade Italian seasoning, the recipe for which is here.
    • ½ Tbsp dried oregano
    • ¼ tsp red pepper flakes
    • freshly cracked pepper to taste
    • 2 oz. feta cheese
    Instructions
    1. Add four cups of vegetable broth to a large pot. Break the fettuccine in half to make stirring easier later, and then add it to the pot. Also add the canned tomatoes (undrained), olive oil, frozen spinach, onion (thinly sliced chopped), garlic (thinly sliced), basil, oregano, Italian seasoning, red pepper, and some freshly cracked black pepper.
    2. Make sure the ingredients are submerged under the liquid, place a lid on top of the pot, and then turn the heat on to high. Allow the pot to come up to a full, rolling boil over high heat then remove the lid and turn the heat down to medium.
    3. Allow the pot to continue to boil over medium heat, without a lid, for 10-15 minutes, or until the pasta is cooked and most of the liquid has been absorbed. Stir the pot every few minutes as it cooks to prevent the pasta from sticking to the bottom, but avoid over stirring which can cause the pasta to become sticky and mushy. The pot must be boiling the entire time.
    4. After the pasta is cooked, crumble the feta cheese over top and serve.

    My photo is less-than-desirable and unfortunately I didn't get a good picture of my sous chef since he was busy gumming a apple wheel to bits that later ended up stuck to his onesie. Apparently even blogspot finds the picture so unappetizing it wouldn't upload it. 

    In order to get more protein I sliced up some chicken breasts, threw them in some Italian seasoned breadcrumbs (and just hat- no egg wash or anything to make it stick) and sauteed them in olive oil until they browned. Justin said they were fancy chicken nuggets, but I'm not sure if that's a compliment or not...

    Monday, September 9, 2013

    Beef Taco Pot

    I have a confession to make. Since Atticus was born in February our dinners at home have mainly consisted of Velveeta Cheesy Skillets and Hamburger Helpers. At first it was because I needed quick food options I could prepare with a newborn. Then it just turned into laziness. I mean, it was done in 30 minutes! When I get home from work the last thing I want to do is cook for an hour. That's just masochistic. Once Atticus was more independent and fine sitting in his high chair while I cooked I decided to bite the bullet and start cooking from scratch. It's healthier, tastier, and more budget friendly- all of which are things I need more of in my life. But a lot of the recipes weren't quicker. Tasty? Yes. Healthy? Yes. Inexpensive? Yes. But not faster. I pinned this little number thinking it would be another 45min-1hr production. The blogger who created it is one of my favorites; she does inexpensive and healthy-ish. Plus she's a New Orleans blogger who likes spice! The recipes of hers that I have tried have been quite delicious but have taken varying amounts of time to prepare. But even with frozen meat (I forgot to take it out to thaw last night) this only took 30 minutes!

    Here is the original pin: 

    Beef Taco Pasta - Budget Bytes
    Nice enough picture


    Here's my picture:
    I never said it would be pretty.


    It was pretty simple and straightforward. I made a few adjustments because of what I had on hand and needing to get rid of things in my fridge, but it was quite tasty. Here's the recipe and my adjustments.

    Ingredients
    • 1 Tbsp olive oil 
    • 1 small onion 
    • 1  2 clove garlic 
    • ¾ 1 lb. lean ground beef 
    • 1 Tbsp chili powder 
    • ½ tsp ground cumin                       I used 1.5 T of my homemade taco seasoning; here's the recipe
    • ½ tsp dried oregano 
    • ⅛ tsp cayenne pepper (optional) 
    • 1 (15 oz.) can diced tomatoes        I used 2 10-oz cans of medium Rotel tomatoes with chilies
    • 1 (4 oz.) can diced green chiles 
    • 2 cups beef broth*
    • 8 oz. wide egg noodles 
    • 1 (2.25 oz.) can sliced chopped black olives 
    • 1 cup shredded cheddar cheese
    • 2-3 green onions, sliced
    Instructions
    1. Dice the onion and mince the garlic. Cook both in a large pot with the olive oil over medium heat for 2-3 minutes, or until they begin to soften. Add the ground beef and continue to cook until the beef is fully browned.
    2. Add the chili powder, cumin, oregano, diced tomatoes, and diced green chiles  taco seasoning and Rotel tomatoes (do not drain the tomatoes and chiles). Stir to combine with the beef.
    3. Add the noodles and beef broth. Stir to combine and push the noodles down until they are mostly submerged under the broth. Place a lid on the pot and allow it to come up to a simmer. When it begins to simmer heavily, turn the heat down slightly (just above low) and allow it to continue simmering for 10 minutes. Stir every few minutes to keep the pasta from sticking to the bottom of the pot.
    4. After about ten minutes the pasta should be fully cooked and most of the broth absorbed. If it is still slightly watery, let it continue to cook for a minute or two without the lid. Taste the pasta and if it is not spicy enough for you, add the cayenne pepper.
    5. Drain the can of black olives and stir them into the pasta. Add the cheese and stir it in until it is fully melted. Slice the green onions, sprinkle over top, and serve.
    Notes
    *I use Better Than Bouillon soup base to make my broth rather than using canned or boxed broths. It is much less expensive.
    *Instead of using separate cans of diced tomatoes and diced green chiles, you can use one can of Rotel or a similar diced tomato & green chile product.
    *Instead of using individual spices, you can use one packet of taco seasoning.
    I obviously took her notes to heart.

    In the future I'm thinking to cut out some of the meat and add a can of black beans instead. But overall, this was a definite repeat.


    And to make up for my ugly earlier picture here's a picture of my handsome little sous chef. I'm thinking to turn into a calendar. 


    Saturday, September 7, 2013

    Dream Machine


    About a year ago an aunt gave my mom a lot of things that had been sitting in her storage unit. Because we were still living with my parents my brothers got the furniture and most appliances. I kept a few neat decor pieces and an ice cream maker. I would say I got the better end of the deal. We didn't use the ice cream maker much until a few weeks ago when organizing cabinets and chucking things I didn't use (who needs two fondue pots??). I was about to chuck it but decided, "let me try it first to see if it's worth keeping." Boy howdy, is it worth it! We started off with a Giada DeLaurentiis recipe for Chocolate-Hazelnut gelato. DELICIOUS! Next we tried a rocky road recipe. It was okay, but I need to tweek the recipe a bit. Last weekend we went to Houston and wanted to bring our dream machine with us. Because my sister-in-law is lactose intolerant we thought we'd try our hand at a raspberry lemonade sorbet recipe I'd seen on Pinterest. It was a bust. My in-law's freezer does not get cold enough and it just tasted not quite how I'd like. But at a trip to Sam's this week they had raspberries on sale so I bought a pint, a bag of lemons and set out to find a recipe that would work.

    Lemon Raspberry Sorbet | The Frozen Fix: SO TASTY! I nixed the vodka and used 1c water 1.5c raspberry lemonade


    Any recipe that calls for lemon zest is all right with me. I love using it and my beautiful little juicer. They make me feel like a serious chef. So the fact that I got to use both tools made my heart happy. While this didn't have a very strong raspberry taste like the previous recipe did. I tried to add a bit of raspberry flavoring my subbing some of the water for the Real Lemonade Raspberry Lemonade. I tell you, I could have eaten it all straight out of the ice cream maker. Shoot, we all had a taste- Justin, Atticus, and myself. Well, Atticus licked the spatula I used to transfer everything. He is my son- he loves lemons.
    The basics- lemon juice, lemon zest, and raspberries. The bottle warmer and bottle drying rack were not involved. They just wanted to be part of the picture. 


    My sous chef approved 

    super tasty.

    It almost didn't make it to the container; I just wanted to eat all of it.

    Here's the modified recipe:

    4 large lemons (or enough to yield 1 cup of lemon juice)
    2 1/2 cups water  1c water 1.5c raspberry lemonade
    1 cup sugar
    1 cup fresh raspberries
    OPTIONAL: 2 tablespoons vodka (for smoother texture)  <-- Not needed- these people just like vodka.
    Zest two lemons. Squeeze all four lemons to yield 1 cup of juice. Strain the lemon juice through a sieve to remove the seeds and pulp. In a medium saucepan, heat water, sugar, and lemon zest until the sugar has dissolved. Remove from heat and add in the lemon juice. Chill in the refrigerator or with an ice bath. If desired, stir in vodka. Pour the mixture into the ice cream maker and freeze according to manufacturer's directions. Just as you are reaching the desired consistency, pour in the raspberries and churn for another minute or two until they are fully mixed in.- I actually churned it for about 10 more minutes; the raspberries broke up and got a bit better interspersed throughout the sherbet.


    Thursday, December 20, 2012

    Pumpkin Bread

    The office had its annual Christmas party yesterday. In typical fashion, my boss paid me to bring something on his behalf. I brought a vegetable tray. But on my behalf I wanted to bring something sweet since not many people signed up for desserts. While unpacking in our new place I noticed a bread pan which made me think of this pin: pumpkin bread with browned butter glaze.

    Delicious- amiright?!
    The recipe was pretty straight forward, but I still enlisted Justin since I have bad luck when I try to bake on my own. It turns out I needed him by my side the entire time...

    The first problem (and I think main problem) arose when, after scrubbing the bread pan) I noticed a good amount of rust. I felt uncomfortable baking in it and since it was pretty cheap, I threw it away. So what to do next? Well, since the recipe was enough for two loaves, I simply decided to put it all in one 9X13" Pyrex. I heated the oven while I made the batter and then set the timer to 5 minutes less than the recommended time in the recipe. Next mistake.

    As I was in the kitchen cleaning up dishes and trying to get everything else situated in the new place I began smelling the delicious scent of pumpkin bread. I love pumpkin. I honestly can't think of a pumpkin flavored food I don't love. I mean, have you tried Jamba Juice's Pumpkin Smash? You need to! Anyway.... Back to cleaning dishes...

    The smell was delicious and in my mind I kept thinking, "I should check it" but thought, "It's only been baking half an hour and it's supposed to bake a full hour." about 15 minutes later the smell changed to one I am all too familiar with- burning. Sure enough, I opened the oven and it distinctly smelled like burning. I took out the pan and tested it. While the very tip of my testing knife had parts stuck to it, I could see that the sides and bottom of the pan were black. So I turned the oven off and let the bread/cake creation cool. My heart was sad.

    The browned butter glaze made up for my disappointment though. THIS. STUFF. ROCKED. In all honesty, I think this will be my permanent recipe for pretty much anything needing a frosting that isn't super sweet already.
    I browned the butter for about 10 minutes- wait until the butter is foamy on top but there are little brown bits at the bottom- this stuff is like gold. Next I mixed it with the 2 c of powdered sugar and eventually 4 T of powdered sugar to get the stuff dreams are made of. I am not kidding. And I don't normally think much of frosting. I mean yes, I'll eat it out of the can directly from the store like any other normal person, but I don't think a frosting has ever changed my life like this. It tasted kind of like toffee and was sweet but not overpoweringly sweet. It... Yeah, I can't describe, you just need to try it.

    The verdict: try it, but with a bread pan and in an oven you're already familiar with (this was my first time baking in this oven). The bread itself had a very good flavor and I'm sure it would be good on its own. But boy did that frosting make up for it being burnt.


    Here's the lone picture. The lighting wasn't great and I had to use my phone because my regular camera is still packed up in a box somewhere upstairs.

    My sadder version.

    Friday, June 15, 2012

    I *heart* (fill in the blank)

    Justin and I have had something of an a-typical relationship. We met as missionaries. Yes, we made out during district meetings and yes we got engaged before we got home. Okay, that last sentance was a lie, BUT we did meet as missionaries in what was the best mission in the world- the Belgium Brussels/Netherlands mission. The French side where we served has since been absorbed into the Paris, France mission and the Flemish part of Belgium and the Netherlands are their own mission. It works. We were essentially two missions under one mission president. But it makes me sad that the mission office and mission home in Brussels have been sold. Ugh.... Pain in the heart.... Anyway! We've also been able to travel to a few different places so after seeing this pin,

    Pinned Image

    I decided to make something to reflect it. I know it will be added to, but I like it right now.


    I cut out the map, glued it to cardstock I had on hand to make it stiffer, and the cut that out as well.


    I added a grid so that my OCD tendencies wouldn't tingle too much when I saw it and things weren't perfectly centered. In each cross section, I put a black dot using a permanent marker so it would seep through to the other side.

    Glue to the hearts onto the dots and frame.


    What I did was get a cheap US Atlas from the thrift store ($2.50) and a cheap map of Belgium online ($3). I had this frame already lying around the house but I think I got it for $1 from another thrift store. I had a large heart hole punch and used it to cut out the specific areas we loved (our honeymoon in Cancun being conspicuously omitted becase it was a hellish nightmare for both of us, even if it was beautiful scenery.)

    If you enjoy travel and maps, I recommend it. I love this little makeshift piece.

    Tie Display

    This was actually one of Justin's Christmas gifts. To say the man has a lot of ties is, to put it politely, a gross understatement. I honestly think he has around 100. I wish I had kept the pin, but I deleted it in The Great Purge and have now decided to write about it. But here is the link to the inspiration.

    IMG_2245.JPG

    When I saw it, I knew it was a great idea and way to get rid of Justin's ugly ties that he never wears. While he was out one week for a conference I decided to clean out our closet. And yes I specifically targeted his side. I mean, there were items I had never seen him wear in the 4 years since we'd been home from our missions!

    I went through the pile of ties, keeping the ones that I liked and that I could remember seeing him wear. The ones I decided not to keep were arranged to fit in the shadow boxes I had found on sale at Michael's for $5/each. I had three graphic ones in one and the rest were rolled up and hot glued to a poster board, to match the other shadow box. How did they all fit, you may ask? Well, this is the secret I've kept to myself until now. I cut them. I cut them to be about 8" and then rolled them up. It made them thinner so that I could close the shadow box. Here is the end result:


    Do I think it's a good idea? HECK YES?! Although Justin's sad that he can't wear those ties, he likes seeing them. This way, everyone wins. And considering it only cost me $10, I think it's a great gift. 

    Baked Ranch Chicken

    Although I haven't posted anything recently, I've been working a lot on pins I have; whittling my amount down to a more realistic size. Okay, it's hardly realistic. But I feel better having less pins. It doesn't make me look like quite the pin-obsessed person I've been this past year. That being said, I now how pictures to go with several pins I've done, so here it goes with pins #1, Baked Ranch Chicken.

    I told Justin to take out some chicken to thaw since it was my night to cook dinner. Because our microwave is currently dead with no hopes of resuccitation or a resurrection, and we didn't have fresh parmesan cheese, we had to improvise. Here's the recipe and pin:

    Pinned Image
    Looks are incredibly deceiving

    6-8 Chicken breasts
    1 cup Corn Flakes
    1 cup Shredded Parmesan
    1 cube butter (melted)
    1 packet of Ranch Dressing Mix
    Preheat oven to 350. Mix together Corn Flakes, Parmesan and Ranch packet. Cut the chicken in half, dip the chicken in the melted butter then in the corn flake mixture and place into baking dish. Pour the remaining butter on top and bake for 45-50 minutes uncovered. Enjoy!!!

    So here's what we did and how it turned out

    3 large chicken breasts. Ours didn't thaw in time and since we didn't have a functioning microwave I simply ran them under lukewarm water and cut them into smaller pieces.
    1 c Corn Flakes. I used two and I'm glad I did because there wasn't enough coating mix for the chicken we had.
    1 c shredded Parmesan. We used the stuff from the green can. We wanted to go classy.
    1 cube butter (melted). How much is one cube of butter?! We melted a stick in the oven and towards the end (because that wasn't enough) we added some olive oil.
    1 packet of ranch dressing mix. We don't use the packet but we have it in a Sam's issued box. I used the equivalent amount.

    Here is what it turned out like:
    There's the reality
    It was incredibly salty and greasy. I would have used less butter or omitted it completely and just not dried off the chicken breasts before I dredged them in the coating mixture. Because we cut the pieces smaller it only took 30 minutes to bake, but... Yeah... I'm not sure I want to make this again. If I do, I'd definitely switch a few things.

    My recommendation? Skip it. Or if you want crispy baked chicken, use the corn flakes and dredge your chicken in a milk/egg mixture.

    Monday, June 11, 2012

    Cinnamon Breakfast Bites

    I agreed to bring treats to celebrate a co-worker's birthday. Normally I wouldn't think twice and bring the standard sopapilla cheesecake, but since I'm on the Wellness Committee and we had a health screening coming up, I couldn't justify the copious amounts of butter and sugar. (Well there's that and the fact that I didn't have crescent rolls in the fridge...but we're going with the "I actually wanted to be healthy" for the purposes of this post.)

    So, I went searching on Pinterest for a pin that I could modify to include beans instead of butter/shortening. I remembered this gem:

    http://pinterest.com/pin/203365739393831118/
    ...and got going. The recipe is below for your betterment. Yeah, I was thinking of you when I did this. :)

    Ingredients
    1-1/4 cups flour (I used a mixture of whole wheat and bean flour)
    1 cup crisp rice cereal, coarsely crushed
    2 tablespoons plus 1/2 cup sugar, divided
    3 teaspoons baking powder
    1/2 teaspoon salt
    1/2 teaspoon Butter Buds (this is the “secret” ingredient that makes them so delicious)
    1/4 cup mashed great northern beans

    I used a food processor to get them completely smooth.
    1/2 cup skim milk
    1-1/2 teaspoon ground cinnamon
    2-3 tablespoons of butter, melted

    Directions

    1. Mix flour, crushed cereal, 2 tablespoons sugar, baking powder, salt and Butter Buds in large bowl.


    2. Cut in beans with pastry blender or fork until the mixture resembles coarse crumbs.

    3. Add milk and stir just until moistened. (More mixing making them gummy and dense. Less mixing is light and fluffy!)

    4. Roll dough into approximately 2-1/2 dozen 1 inch balls.

    5. Mix cinnamon and remaining sugar in a small bowl. Drop balls into melted butter and roll in cinnamon sugar mixture.

    6. Place balls into a greased or nonstick mini muffin pan.

    7. Bake at 425 degrees for 15-18 minutes or until inserted toothpick comes out clean. Cool for a few minutes in pan on wire rack before removing.


    Makes approx. 2-1/2 dozen bites and gives you protein and whole grains in a tasty breakfast snack!

    Tuesday, April 24, 2012

    May the odds be ever in your favor

    Yesterday when I came home from work I found my brothers in their new favorite location - family room in front of the TV watching "Heroes". I told them that they should go away and read some books or play a game or something. Gav said he wanted to make a shirt for The Hunger Games premier and since I had this pin, I knew we could do it!

    The pinsipration:
    http://kojo-designs.com/2010/11/gifts-for-guys-guest-craftiness-is-not-optional/


    PINNOVATION

    (Prepare for mind blowing awesomeness...)

    We found images online to create our own designs. Gav wanted to stick with a theme - mockingjay and Peeta.


    Burke decided to be a little clever...


    (He wasn't confused...but I bet you are!)

    I had to adjust the pictures so they didn't use too much ink when we printed since we were running low. I changed it to a grayscale print and used draft mode. (For our designs, click on the links below.)


    Mockingjay design                      Team Jacob design

    Then we got to tracing on wax paper. Yes I said wax paper. My tired brain didn't think to actually read the post before starting. I got to thinking while tracing and realized that I was doing something wrong. I went back to the post and realized I should have been using FREEZER PAPER. We got ready to head to Wally World, but Mom came in with a delicious dinner - stuffed peppers (she used quinoa!). So we ate our tasty dinner and then made the excursion to the store to get the magical freezer paper, paint, shirt, ink cartridges (they still ran out) and an extra X-Acto knife. On a side note - who knew that having a 14-year-old boy pick gold paint could be such a time-consuming process?


    So we returned home triumphant and began again with the tracing the images, but this time on the magical freezer paper (paper side, not the shiny side).


    We cut out the stencils using x-acto knives or scissors. (You have to cut out the part that you want to be on the shirt and leave the outline.)

    Then we ironed the freezer paper stencil to the shirt (paper side up or you'll make a mess with the iron).


    We painted on the shirts with small sponge brushes using a mixture of 2 parts normal acrylic paint mixed with 1 part fabric medium (available at a craft store - Michael's or JoAnn).


    We figured out that the best way to avoid the paint getting under the edges of the stencil was to paint away from the edge.


    We let the shirts dry (the boys may have pulled out my hair dryer to speed the process along) and then applied a second coat of paint mixture.


    When the second coat was dried, then the fun began! We peeled away the magical freezer paper to find that the paint didn't seep through the edges except in one place!!! Like I said - that stuff is magical!


    Gavin was excited while we peeled away the stencil...


    Then we repeated all of these steps with the other part of the design to create these wonderful specimens.


    Yeah, I know you're jealous! (My brothers are adorable, right?)


    And "may the odds be ever in your favor"!

    Friday, March 2, 2012

    No-no Nails

    I should have known it would turn out like this... I didn't even start wearing makeup until college... So why did I do it?! What am I talking about? Decorative fingernail painting. Such. A. Fail. We've seen them all over Pinterest. Nails that look like watermelons. Stripey nails. Nails with printed images/patterns transfered with alcohol. But the fact of the matter is, you have to be freaking Picasso to carry this off. Let me explain myself and where *I think* I went wrong.. Besides in my choice to do this.
    I saw a really cute design using tape and multiple layers of colors on fingernails. You paint one layer, dry, tape it, paint over that layer, remove the tape ASAP, dry, and repeat. Simple enough, right? WRONG! Here is my failure in its epic glory.


    Mardi Gras was coming up and I wanted to be festive. So I used my purple, green and gold polishes.

    I prepped myself by cutting some scotch tape into really thin strips using my X-acto knife.

    I painted the base color green. Let it dry, and then put the tape on.

    Next I put the gold/glittery paint on and took the tape off.

    After letting that dry I put tape when I originally had it, and then in a few more spots. Then I painted my fingernail purple and took the tape off.

    This was the end result. A mighty failure.

    Because I didn't want to be defeated I grabbed one of my tiny paint brushes and tried my technique again.

    Not so bad.
    In the end, I don't think I would recommend this. Unless, as I said before, you're Picasso or a genius. I am neither. I deleted the pin in frustration so I don't have a pin to go with it. But in consolation, here's a clip of the 610 Stompers when they were in Orpheus.


    Sorry the film isn't too great. Several people told Justin that he needs to join the 610 Stompers. I whole heartedly agree. I think he would fit right in.. Except for the facial hair thing. The poor man couldn't grow a mustache or beard if his life depended on it. Which is fine with me.